Quantcast
Channel: BriMor Labs
Viewing all 59 articles
Browse latest View live

All memory dumping tools are not the same

$
0
0

<DISCLAIMER: I am not an in-depth technical expert on memory analysis, and your results and analysis may vary>

A few days ago, Takahiro made a blog post regarding some issues that he discovered while processing a 16GB memory dump on a Windows 7 machine (if you have not read the post, you can find it here). Naturally the findings Takahiro described in his post were concerning since we, as first responders, are often required to gather memory (through a variety of methods) and if Microsoft is * encrypting portions of RAM that will ultimately hamper our analysis, the methods that we use to gather RAM should be adjusted accordingly.

*COMMENT: The volatility crew released a blog post yesterday that did confirm encoding (not encrypting) does occur in some 64 bit dumps, and the method that your tool of choice uses to create the memory dump will determine if the debug block will be decoded or not.

I had access to one Windows 7 machine with 16GB of RAM, but in order to cover as many bases as possible (as so many of us do), I relied on collaboration (in this case with Mari DeGrazia), who had access to Windows 7 devices with 16GB of memory as well. Mari acquired her memory dumps using the free version of DumpIt (v1.3.2.20110401), Belkasoft RAMCapture 64, and FTK Imager 3.1.4.6. I acquired my system with the paid version of Moonsols DumpIt (v2.0.0.20130823), the free version of DumpIt (v1.3.2.20110401), Belkasoft RAMCapture 64, and FTK Imager 3.1.4.6.

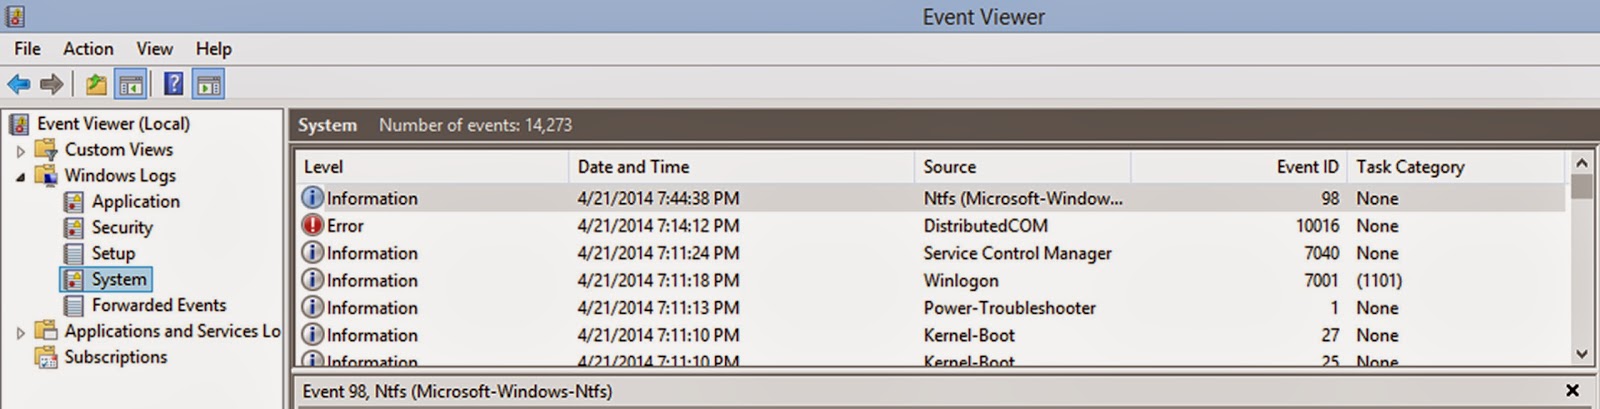
On all of the memory dumps, regardless of the tool that was used to create the dump, the "imageinfo" processed the dumps for a long period of time (I finally cancelled the processes after 2 hours, Mari had similar results). This is likely because of how volatility currently processes the  image information scan, which involves some initial kdbg (KdDebuggerDataBlock) searching, as the kdbgscan itself worked fairly quickly on all of the images except for the one created by the free DumpIt tool.

"imageinfo" running for over two hours, with no results = sad panda :(

On the Windows 7 machines, we found, when we used the appropriate profile (Win7SP1x64 in this case) that FTK Imager and RAMCapture64 created a memory dump that was processed with no issues using volatility 2.3, and my findings were that the paid version of the Moonsols tool produced a dump that was processed with no issues as well. However, the free Moonsols tool produced a memory dump that was unable to be processed with the default volatility settings, as well as being unable to be processed while giving volatility some of the more robust options as well. (COMMENT: Make sure if you are manually inputting the kdbg offset, you are using the "virtual" location(s), as the "physical" location will not provide good (if any) results)

The reason for this is likely that volatility, in its current state, attempts to find the kdbg and as soon as it finds a signature match, it uses that location to determine the profile type and other items within the memory dump. It also provides the operating system profile that is given by the examiner to volatility to extract information from the various volatility plugins. It is possible for volatility to detect the "wrong" profile as it currently searches for the kdbg information based on a signature search (in fact, this is currently being worked by the volatility team, and has been identified as a possible issue (one example is here)).

With the free DumpIt tool, even the in-depth options of manually specifying the kdbg location, volatility still did not produce any results from the memory dump. This may be because the free DumpIt reads the memory differently than other tools (that is likely, as all memory dumping tools are not the same) and aligns perfectly with the results that Takahiro, Mari, and I encountered. Below are the results of kdbgscan and pslist from the memory dumps created by each tool:


kdbgscan from free Moonsols DumpIt memory dump

kdbgscan from paid Moonsols DumpIt memory dump

kdbgscan from FTK Imager memory dump

kdbgscan from Belkasoft RAMCapture memory dump

pslist from paid Moonsols DumpIt memory dump

pslist from FTK Imager memory dump

pslist from Belkasoft RAMCapture memory dump


pslist: Free DumpIt, kdbg specified, no good results

netscan: Free DumpIt, kdbg specified, no good results

So, for now, the best recommendation that we can make is to know and understand your tools and their limitations. While you may not need to know the exact API and methodology that each tool uses, you should be aware that in some cases some tools produce better results than others. I personally like the Belkasoft RAMCapture tools, but always make sure that I have additional tools (Moonsols, FTK Imager, f-response, etc.) on hand if I encounter issues while creating a memory dump. As when it comes to imaging a hard drive, the "usual" way is good, but always make sure that you have some other options, just in case.

One more item of interest that I encountered is that, on a properly patched/updated Windows 7 system and later (including Windows 8), the OS now prevents writing to the Windows/System32 folder from a command line entry (even with administrative privileges) without other, external factors. So, for example, a batch scripted collection using DumpIt (free and paid version, although the free version does not work on Windows 8) will cause an error and the memory will not be collected. If you click on the icon for the DumpIt executable the operation works perfectly, but be aware if you are trying to use DumpIt with a batch script or running the program from the command-line.

Cannot find C:\Windows\system32\DumpIt.sys


This is likely an issue that will continue to pop up as the size of RAM increases and the tools that we currently to acquire memory, as well as analyze memory, continue to evolve. We are just scratching the surface on this topic and there are sure to be more posts on this subject in the future!


Identifying TrueCrypt Volumes For Fun (and Profit?)

$
0
0
The volatility crew posted a couple of new plug-ins that can search through a memory dump and extract TrueCrypt passwords (please read about it here). But what about TrueCrypt volumes themselves, how can you find those on a system? There are some tools (like TCHunt) and EnScripts (TrueCrypt File Locator and Encrypted Data Finder) that can help you to find TrueCrypt volumes. (DISCLAIMER: I am no longer a user of EnCase and the scripts may/may not still reside at those locations so I cannot verify how well the EnScripts work). But what if you do not have access to those tools, or what if you want to know more about WHAT these scripts are actually doing?

You can choose to encrypt your entire file system or drive, which protects the contents of your hard drive, but without an decryption key, your drive is essentially nothing more than a paperweight. You can also create individually encrypted file containers on a non-encrypted file system/drive.

This post will not cover the full disk encryption. However, it is important to note that some of the TrueCrypt characteristics discussed in this post, particularly the character distribution, will apply to anything created with TrueCrypt. For this post, we are going to focus on individually encrypted files created with TrueCrypt.

The first thing to note about files created with TrueCrypt is that the encrypted file is essentially a file container. On a Windows system, you can go through the process and you are presented with an option of either choosing a FAT or NTFS formatted container (if the file size is less than 3792KB, you can only choose FAT or None). If you choose "None" you will have to format the file after it is mounted, but usually this option is not chosen.

TrueCrypt container format options

Now that we have a little bit of background information, we can move on to the fun part, trying to identify TrueCrypt volumes on your drive. One of the tell-tale signs of a file being a TrueCrypt volume is anything with the extension ".tc". This is the default association of a file as being a TrueCrypt file, but to be honest, if you find ".tc" files, the level of sophistication of the user(s) of the drive may not be very high. Or perhaps there are hidden volumes created within the TrueCrypt volumes meant to throw you off (that will be a post for another time!)

Usually TrueCrypt volumes can be found in folders where "large" (several hundred MB and larger) files are commonly stored and are renamed to look normal among those files. For example, some locations I have encountered are folders associated with Outlook.pst files and downloaded videos.

Another thing to note with TrueCrypt volumes is the file sizes that the file "has" to be. The smallest size that a volume can be is 292KB. So we probably want to look for files that have a minimum size of 292KB (299,008 bytes). Because TrueCrypt volumes can increase in size by 1KB (1024 bytes) increments, we could search for all files that are only cleanly divisible by 1024 bytes. However, as the smallest allocation unit on a disk is a sector (which is typically 512 bytes), we will search for any file sizes that are cleanly divisible by 512 bytes. I would rather have more possible false positives rather than potentially missing some possible TrueCrypt volumes.


Three 292KB TC volume file properties

For example, one of the files referenced above "1small.tc" has a file size (not size on disk, although with TrueCrypt volumes they are usually the same) of 299,008 bytes. We can take the size of that data and divide it by 512. If the result comes back clean, aka a whole number, our file has passed the size check test, so the file is possibly a TrueCrypt file.

299,008 / 512 = 598 = Pass!


Test-document.docx file properties

For another example, here's a test document that I created - "Test-document.docx" which has a file size of 461,359 bytes. Once again, we take the size and divide it by 512.

461,359 / 512 = 901.091796875 = Fail!

From this, we have learned that really don't have to look any more at the file "Test-document.docx" because it failed one of the easiest tests to perform when trying to find a TrueCrypt volume. Great success!!


The next step that we can take to determine if a file is possibly TrueCrypt or not is by trying to discern the file signature. There are MANY ways to do this, one of the examples I am going to demonstrate is running "file" on a Windows system using GNUWin32. 

Running "file" against our two files of interest

Running "file" recognizes the possible TrueCrypt volume as "data", but the Office document as a "ZIP" file (which it is and has been since Office 2007). So now we know that the file "1small.tc" has passed the file size test and that it does not have a discernible file header. High five!!

High Five!

Now for the last step in trying to determine if our file is possibly a TrueCrypt file or not. There are once again several ways to do this, but I prefer to use Hex Workshop for this blog post as it makes prettier pictures than running a script of some sort. What we are looking for now is "entropy", aka "randomness", aka "character distribution". File data is stored as an arranged series of bytes on disk. What we are going to look for is how many times certain characters occur in the file. In most files, some characters will occur far more often than others (\x00, \xFF, etc.) In a TrueCrypt volume, the program tries to distribute the characters in a completely "random" (i.e. equally occurring) format. 

To explain this in simpler terms, if a "normal" file is made up of "01189998819991197253" (7 occurrences of 9), a TrueCrypt file will be made up of "01234567890123456789" (each character occurring only twice). With smaller TrueCrypt volumes the percentage of character occurrence is close to being "random", but it is not perfect. The highest percentage of character occurrences that I have seen in testing is 0.47%. As the size of the volume increases though, the percentage of character distribution is more level at 0.39%. I have seen tools demonstrate the "randomness" on a scale of 1 to 10, 1 to 8, and even 0 to 1, with different values correlating to how random the data is. Once again, for the purposes of this blog post, I prefer to use Hex Workshop to demonstrate the distribution. Below are three examples from random Word documents I downloaded from the web, three examples from smaller TrueCrypt files (292KB) and two examples from TrueCrypt larger files (1GB). Even though the actual number of times the characters appear varies, what we are looking for is the percentage of how many times those characters occurs. 


finalreport.authcheckdam.doc character mapping

PilotProjectFinalReportRev2.doc character mapping

TCR-AL252005_Wilma.doc character mapping

1small.tc (292KB) character mapping
2small.tc (292KB) character mapping

3small.tc (292KB) character mapping

TC-hidden-test (1GB) character mapping

TC-test (1GB) character mapping

To summarize all of the topics covered in this post, there are three main characteristics of TrueCrypt volumes that we can test for:

- Minimum File size / File size being a multiple of 512 bytes
- File Signature check
- Character distribution


I sincerely hope that you enjoyed this post on identifying TrueCrypt volumes for fun (and profit?). Hopefully you did indeed have a little fun reading this and can eventually turn that into profit of some sort!


Quick overview of how some RAM scrapers work

$
0
0
(EDITING NOTE, 27 January 2014. After looking into the regular expressions more, the first regular expression in the malware sample matches Track1 data, so I updated the post with a table, also from tech-faq, which details the data stored in Track1 data. This piece of malware scans for patterns that match either Track1 or Track2 data. This method is a more cumbersome (aka more resource intensive) than searching for only Track2 data, as often both Track1 and Track2 is stored in memory for a brief period of time, and extracting both sets of information means a probable duplication of data. In order to lessen the impact on a system as well as making the eventual exfiltraiton of data smaller, most attackers use malware that only grabs that grabs either the Track1 or Track2 (most commonly Track2) or use another tool to "clean up" collected data in order to take the smallest amount needed.)

It has been in the news all over the place lately. "Credit cards from major US retailer stolen", "Cyber criminals use RAM scraping malware to lift credit card transactions", etc. Every week there are stories emerging about another breach of credit card information. I have even heard some of the recent breaches referred to as "economic terrorism" (my own opinion is that comment might be on the extreme side, but it is definitely deserving of our interest).

This blog post is going to walk through some of the details that I've noticed with some of the RAM scraping malware that I have encountered, including one instance of a piece of malware that VirusTotal currently lists as non-malicious (NOTE: The last analysis was performed on 09 November 2011 and the first analysis was performed on 20 April 2011. Until I chose to reanalyze the malware while writing this post, the 0/43 rate was what the VirusTotal result returned. The new result had 30 out of 50 AV vendors detecting the file as possibly malicious, but that is still only 60%)

Original RAM scraper detection rate was 0/43
A much better 30/50 detection rate on rescan. But that is still only 60% of AV programs

So what makes a RAM scraper? Well, in most cases the RAM scrapers monitor processes running in memory for items that look like the credit card transaction data. Credit cards actually do follow length requirements and beginning numbering schemes, and most follow the "Luhn algorithm" (The wikipedia write-ups on the bank card numbers and the Luhn algorithm is an excellent explanation, so I will not explain it again).  

UPDATE: Track1 data contains more information than the Track1 data, and is usually able to be determined by the presence of names as well as the "^" character, where Track2 data usually contains the "=" character. The Track1 data breakdown table is also taken from tech-faq.

Breakdown of Track1 data

What we will cover in more detail is Track2 data, which is part of the data which resides on the magnetic stripe on the back of a credit card. Track2 data is the data that a majority of the RAM scrapers, that I have encountered, are monitoring memory for. The table below, copied from tech-faq, lists a brief breakdown of the data that is present in Track2 data.

Breakdown of Track2 data
In most cases Track2 data is present, unencrypted in memory, for a very brief period of time, as it is against PCI requirements to store Track2 data. That is where the RAM scraping malware comes into play. It usually monitors processes that are running on the system, and when it sees data that matches the pattern that fits the Track2 data requirements, it grabs that data and either saves it to a file on the device or exfiltrates the data from the compromised system. In this example I loaded the malware into PeStudio (a great, and FREE tool put together by Marc Ochsenmeier that can be downloaded here). The main thing to highlight is this, and many other RAM scrapers, rely on regular expressions that fit either Track1 or Track2 data. 

Track data regular expressions in this piece of RAM scraping malware. 18B46 will grab Track1 data (note the ^ character) and 18F92 will grab Track2 data (note the = character)

Possible malware indicators detected automatically by PeStudio

If only there was a way that AV (or other) solutions could monitor memory and/or processes for other executables that search for Track data... Of course the cyber criminals would then likely change their methodologies in order to circumvent that as well, but this is likely the next stage a very long battle between those trying to steal information and those trying to protect it.

Target POS Malware vs. Open Source Tools

$
0
0

The popularity of my last blog post on "how" POS malware functions was honestly a bit of a surprise to me, so I am following it up with another blog post covering the "advanced Target malware" (as I have heard many other "experts" call it) and seeing what information I can pull out of the sample using open source tools. A large portion of my post and research was inspired after reading a very good write-up from Mark Yason, 
which you should definitely read if you have not already done so. After reading his post, I wondered how the comparison of the findings of Mark, and others, compared to the results of freely available tools. In other words, if you do not have much malware reverse engineering experience, exactly how much information can you discover if you have a little bit of time and access to free tools?

The first thing that I did was manage to acquire the malware sample itself (md5sum: ce0296e2d77ec3bb112e270fc260f274), which took quite a bit of digging. Once I finally did find it, I uploaded the sample to VirusShare, where you can download for yourself if you have an account (and if you do not have an account, you should definitely request one). Once that was done I took a look at the file using PeStudio (download) from Marc Ochsenmeier to see what information I could pull out of the malware.

Using PeStudio I was able to determine there were several indicators that the file was malicious, the compile time of "Thu Nov 28 18:08:01 2013", some strings of interest, and even the possible original project path of the malware.

PeStudio initial findings
Possible compile time
A couple strings of interest, including possible project path
From these strings, I had the information that I needed to move onto the next phase, which meant setting up a fake POS environment. For my "fake POS environment" I used a stand-alone Windows XP desktop that I picked up at a second-hand store over Christmas vacation (acquired specifically to be my "Malware Box of Evil") that I put Brian Baskin's Noriben malware sandbox analyzer on. Brian's tool is free (you can donate money to him for adult beverages if you wish).

Brian Baskin's Noriben (background)(download)
 - Requires ActiveState Python 3.3.2.0 (download) and Sysinternals Process Monitor (download)

I created some fake Track1 and Track2 data in a text file. Since the Target malware was specifically targeting the executable "pos.exe", I copied notepad.exe from the C:/Windows folder to the desktop and renamed it "pos.exe" and opened my text file of fake card data by dragging it onto "pos.exe" executable. Although the executable functioned exactly the same as notepad, this method made it appear that "pos.exe" was running and contained Track1 and Track2 data in memory. Once that was done, it was time to use Noriben to see what data I could extract from the system. Having already installed Active State Python, it was simply a matter of running Noriben and waiting to see what the Noriben/Process Monitor combination would reveal. I entered the command to kick off Noriben and once the program told me it was ready, I double-clicked on the malware, which I named "kaptoxa.exe". Surprisingly the malware did not delete itself, "hide" itself from the Windows GUI interface, or anything; it remained sitting on the desktop. (My first definitive indication that this piece of malware was by no means "advanced")

After about a minute I saved the fake card data to two files, foo.txt and foo2.txt, in an effort to try to coax more of the data to be loaded into the fake "pos.exe" process, just in case. Once I was satisfied, I exited Noriben and waited for the results. Not surprisingly, Noriben extracted ALL of the information that I was hoping to see. It confirmed all of the findings that I have seen published on the Target malware to date. Every single piece of it, including the exfiltration commands sending the data to another computer, with the "domain/username password" credentials "ttcopscli3acs\Best1_user BackupU$r" (surely I am not the only one that finds the irony in the most complex string, by far, in the domain-username-password combination is the domain name). I was even able to easily find the "winxml.dll" file in the C:\Windows\System32" folder where the malware stored the Base64 encoded Track1 and Track2 data!

Noriben created processes (note net use, internal IP addresses, paths, domain-username-passwords, and file naming scheme)
Noriben file activity
Noriben registry activity (note POSWDS\Image Path is the full path to where the malware resides)
Noriben network traffic
winxml.dll in C:\Windows\System32 (file logging Base64 encoded Track data)

Contents of "winxml.dll" file (Base 64 encoded Track data)
So there you have it. You can take the Target POS malware and two free tools, which cost a staggering FREE, and gather pretty much all of the information that seasoned malware reverse engineers were able to find while digging through the malware sample. The research that I did on the piece of malware was accomplished in about two hours using these tools, and I am most definitely NOT a malware reverse engineer. I know some RE basics, but anyone could have used these tools and gathered the same results. The freely available tools highlight the hard work put in by tool developers like Brian and Marc that allow us to automate processes and tasks that would have taken us many hours to have performed previously. It also highlights the fact that this piece of malware wasn't particularly advanced by any means, it simply was created with the information needed to target the Target environment specifically (see what I did there?). Cyber criminals will continue to use malware that is only as advanced as it needs to be to allow the compromise, collection, and exfiltration of data. While companies continue to employ weak security practices such as basic username and passwords combinations, the attackers have to make very little, if any, modifications to existing families of malware.


Automating Initial Data Gathering for Windows Live Response

$
0
0
This blog post will cover something that I have often encountered throughout my career in the DFIR field and my (small) contribution to try to alleviate the issue. The typical commercial incident response scenario kind of follows this order:

1) Receive frantic call along the lines of "we have been hacked"
2) Calm <client> down, try to determine what all they know
3) Ask <client> what the size of their environment is
4) Explain size will likely determine cost/length of engagement
5) Attempt to have client do initial data gathering of volatile data 
6) ..... <awkward silence>

Well, good news everyone!! I've been working for quite some time on trying to automate the initial data gathering in a client environment and I finally think it is ready to be widely shared, especially since it is just a collection of tools and a batch script that runs the tools. I present to you <drum roll please> ... the Windows Live Response collection!

That is right! Now, you can simply send your client a zip file or point them to a download link, have them put the file(s) onto an external drive of some sort, let them run the batch script, and allow them to sit back as the data is gathered automagically! I am quite sure that there are similar programs out there, I know Michael Ahrendt did quite a bit of work on Triage-IR in the past, and I am sure that some of you may have something similar, so by no means am I trying to re-invent the wheel. I am merely sharing what I have been working on automating/collecting during my incident response process. The batch script automates the collection/creation of:

  • Memory dump (using Belkasoft RAM Capture) (if run with Admin privileges)
  • Prefetch file copying (if run with Admin privileges)
  • Network connections
  • Default gateway correlation (more on this in a future blog post)
  • System versions
  • Time/date settings
  • Running processes
  • Loaded dlls
  • Runs (and cleans up after) some SysInternals tools
  • And many, many more!

LiveResponse.zip - download here

md5: 8a34559b4c681fa37bf608187daf07d0
SHA256: 2791d029f16227c82af65ce658016fb758242cca46bf3aa4750cd2d0be1dceff


Upload Date: 16 October 2014


(Thanks to @The_IMOL for pointing out I didn't include the hashes for comparison sake!)

Outside of the tools the scripts uses, I also included several other utilities including PeStudio from Marc Ochsenmeier. Once again, please feel free to add additional tools/methods as you see fit!

Fortunately, the collection comes with the "Compromised Windows System Live Data Gathering Checklist" which details each of the commands, and the command syntax, that the script runs. (ONE IMPORTANT NOTE: In order to run nmap, winpcap is installed on the system. I originally included the script to uninstall it, but that requires user interaction, which I wanted to limit. You can take it out if you wish, or you can uninstall it manually (or keep it on there for future use, the choice is up to you.)) 

My typical usage scenario is I first put the tools on an external drive, usually a large capacity flash drive, or if I am also going to create a disk image, an external USB hard drive. (If the system is using Comodo or other sandbox/isolating AV, I will ensure that it is not sandboxed/isolated)(I love that Comodo tries to protect me from myself!) Then I run the script either as Administrator or with normal privileges (which the script determines for you), and then sit back while the data collection happens. I've had the best success using the Belkasoft RAM Capture tool, as I highlighted in my RAM collection tool post, plus it is free and works on every Windows system that I have ever encountered, including Windows 8.1.

I did not attempt to conceal what the script does or anything like that and would very much enjoy hearing additional items to include, exclude, or hearing about modifications that you make to it in order to make it more suited for your environment. 

My eventual goal is to include all of the executables themselves in this collection, so if for example "ipconfig.exe" has been replaced with a malicious executable, you don't have to worry about additional issues. I would also like to create a script that parses through the results of the data and attempts to identify possible areas of interest to focus on (more on that in a future post too, specifically Prefetch files). I am also working on creating similar scripts/collections for the OSX and *nix environments, but since I encounter Windows more often than the other operating systems, I decided to focus my efforts more on the Windows side, for now.

I chose the Mega site for hosting this download because it has the widest available "free" bandwidth that I could find (10GB every 30 minutes). I used this script while running through my Target malware research as well as several "real-world" cases that I have worked. I have been tweaking and making adjustments ever since the first basic version I threw together, and based off of feedback will continue to add new features and make improvements.

I want to again thank Mari DeGrazia and Adrian Leong for the extensive testing that they performed on this script and dealing with my emails and chats at odd hours with bug/issue fixes. By all means please feel free to make any changes and/or modifications to the script and add any additional tools that you want. If you would like to know a little bit more there are plenty of great resources, one of the online resources that was recommended to me was Rob van der Woude's Batch scripting pages.

I hope that you find this post and the tool useful and insightful. If you have any questions/comments/feedback/grumblings/gripes/etc. please feel free to reach out to me through the comments, drop me an email, or however you with to communicate! This collection will also be one of the topics that I will be discussing on this weeks Forensic Lunch, so be sure to tune in on Friday afternoon!


Chewbacca vs. Open Source Tools (maybe this should be a theme?)

$
0
0
You have probably heard of the "Chewbacca" POS malware that uses TOR (The Onion Router) (aka "anonymous web traffic") as a way to exfiltrate data from the system. If you have not read the Securelist blog post I definitely recommend it. It is, by far, the best post that I have seen on this malware to date. While the development of another way of exfiltration is interesting, the RAM scraping and persistence method that the malware used is very basic, and in testing, it did not even run "properly". Attackers will use tactics that are only advanced as they need to be in order to exfiltrate data. In most environments, attackers can probably gain remote access to the system(s) and exfiltration is often nothing more than uploading files to an online storage site like Mega, Dropbox, Box, WeTransfer, etc. Attackers will not use advanced exfiltration mechanisms if they can simply remotely log into a system and upload data to a site like WeTransfer.

I was able to get my hands on a sample of malware thanks to Brian Baskin (malware reverse-engineer extraordinaire, Ghetto Forensics creator, all around good guy, and a HUGE contributor to a lot of the details in this post). After snagging the sample, I performed some basic analysis (using the same methodology that I used for the Target malware). Interestingly enough, the malware would not fully run on my Malware Box of Evil (MBE), which currently runs Windows XP, as consistently got the exception error listed below. It is possible that this is because the malware was designed for a later version of Windows, as both the esteemed Brian Baskin and myself performed a variety of tests and determined that the malware would work on other versions of Windows, including Server 2003, Server 2008, Vista, and Windows 7. (AUTHOR NOTE: Please see "Additional Research" at the end of the post that covers more details of how the malware works on XP/WEPOS.)

I first loaded the malware into PeStudio and found, beyond the basic items of interest, the regular expression the malware uses for searching for Track1 and Track2 data. This regular expression varied slightly compared to previous versions of malware that I have seen (most likely to account for more non-US track data (shorter credit card numbers starting with only 13 digits)) but it still performs the same basic function. 


Chewbacca file info in PeStudio. Note the hashes, as they are the same as in spoolsv.exe

Chewbacca searching for Track1 and Track2 regular expressions. Note the hard-coded URL as well!

Only this time, when the data is found, it is supposed to exfiltrate the data to the hard coded URL automatically via TOR, using tor.exe, which is included with the malware. 


WINDOWS XP TESTING

Once again, because of the unhandled exception I could not get the malware to fully run on the MBE, all it did is made an exact copy of itself  to "%AllUsersProfile%\Start Menu\Programs\Startup\spoolsv.exe"


Windows XP spoolsv.exe startup location
PeStudio 8.05 file information. Hashes are the same on Chewbacca and spoolsv.exe

The expected keylogger file "system.log" was not created (in fact no additional files were created) and there did not appear to be any attempted outbound connections. I verified this by running Noriben (created by the aforementioned Brian Baskin).


Noriben created processes and created files of partially run Chewbacca malware

I even allowed the MBE to connect to the interwebs (through an anonymous connection, of course) in an effort to see if an actual connection was needed and I got the same unhandled exception error.

Unhandled exception error message on Malware Box of Evil when trying to run Chewbacca. RUUUUUrhrGUGUGHRhghghghrRURURUghGHrrrrrr!

WINDOWS 7 TESTING

On Windows 7, the output was more along the lines of what was originally expected after reading the Securelist post. In this instance, the executable again copied itself to spoolsv.exe under "%AllUsersProfile%\Start Menu\Programs\Startup" (which performs the same persistence functionality, but the path is different on newer Windows systems), deleted the original "chewbacca.exe" file (a very common malware characteristic), attempted to connect to "ekiga.net", and created the keylogger file, in the %TEMP% folder (on Windows 7 it is "C:\Users\<USERNAME>\AppData\Local\Temp"). All of this data was easily presented to me, with my limited malware reverse engineering background, by Noriben (thanks again Brian!)

Noriben output of Chewbacca on Windows 7

Windows7 spoolsv.exe startup location
Chewbacca is gone!
Attempted to connect to ekiga.net
system.log keylogger location and file contents

PeStudio Update: I shared some of the strings information with Marc yesterday and he updated PeStudio so now the Track1 and Track2 data regular expressions (and other strings of interest) present in this sample are blacklisted. PeStudio also now pulls out the default icon of a possible malware sample as well, which is one of my "quick triage" tricks to try to determine if any executables on a system might be malicious. Definitely go and download PeStudio 8.06 if you haven't already!!

PeStudio 8.06 blacklisted strings. Some (but not all) of the key ones from Chewbacca are highlighted


ADDITIONAL RESEARCH


Additional research shows the unhandled exception error may have a combination of the malware not running properly and as a result of DeepFreeze, which I run on the MBE in order to get the system back to an original state after looking at malware and other test environment fun! When Chewbacca was run on a Windows XP virtual machine and the WEPOS virtual machine, the malware ran, made a copy of itself named spoolsv.exe the Start Menu folder, attempted to connect to ekiga.net, however, it did not start the system.log keylogger or delete the original chewbacca.exe. After rebooting the systems the keylogging did start, which was saved in system.log, however the original executable remained. Brian also noted that "when the malware sample is run, it does a check to see if it is run with an argument (a file path). If there is no argument, it copies itself to spoolsv.exe and runs the new copy of itself with an argument of the original file's path. If there is an argument, the malware will delete the argument (file path) and continue. It could be crashing before the original running of the chewbacca.exe is complete, or it could be crashing before the deletion of the original file (or argument) is complete."

Thanks to this malware, I also acquired the WEPOS and POSReady2009 operating systems to install on the MBE in order to better replicate a POS environment and watch how malware performs in those environments. It will definitely be interesting to see if more malware is created specifically to target newer operating systems as Windows XP nears the end of life (WEPOS is supposed to be supported through 2020, although Windows XP Embedded and Server 2003 Embedded are supposed to have support only through 2016 and 2018, respectively).

Based on the testing that Brian and I performed, if the environment was running Windows XP or the original Windows Embedded Point of Service (WEPOS) version 1.0 through 1.3, the malware will not fully work (delete the original chewbacca.exe file, start scanning memory for Track1 and Track2 data, etc.) until the system is rebooted. It will only create spoolsv.exe in the "%AllUsersProfile%\Start Menu\Programs\Startup" location, but the system has to be rebooted in order for the malware to create the keylogger and begin scraping memory for Track1 and Track2 data.

Brian also made an interesting comment while reviewing this piece of malware. In his long and illustrious career of reverse engineering malware samples, this is the first piece of malware he has ever personally encountered that was created using Free Pascal Compiler (that used actual Pascal) and was, quote, "definitely weird". So Chewbacca has that going for it, which is nice :) 


Angry Birds Chewbacca, Lego Chewbacca, and dog chew toy Chewbacca.


Small update to Windows Live Response tools

$
0
0

Good news everyone!! I added PeStudio 8.06 and Last Activity View to the latest version of the Windows Live Response tools. Last Activity View runs without any user interaction when run as an Administrator, so I put it in that section of the batch script rather than having it run in the non-Administrative privileges portion.

For more about PeStudio please click here
For more about Last Activity View please click here

Last Activity View seems to add some additional Unicode characters into the output from time to time so it is not 100% reliable, but it can help give you some insight to what activities occurred on the system(s) prior to running the Windows Live Response tools.


Browsing to the Chewbacca malware, as seen with Last Activity View


LiveResponse.zip - download here

md5: 8a34559b4c681fa37bf608187daf07d0
SHA256: 2791d029f16227c82af65ce658016fb758242cca46bf3aa4750cd2d0be1dceff


Upload Date: 16 October 2014


Using Prefetch Files to Perform Triage Analysis

$
0
0

The topic of today's post is one of the methods that I use to help determine which system(s) are possibly infected with malware as quickly as possible. I will not cover the basic structure and formatting of the Windows Prefetch files, as there are PLENTY of topics on that. If you want to learn more, I highly recommend starting with the Prefetch entry on the ForensicsWiki if you are not familiar with the structure of Prefetch files. To be very brief, when an executable is run on a system, the Windows operating system usually creates a Prefetch file associated with that executable and records everything that the executable accesses within 10 seconds of starting. Admittedly there are MANY factors that can change what data is recorded in the Prefetch files, including malware itself, and, in some cases like systems with solid state drives, sometimes Prefetch files don't exist at all.

But once again, this post is not going to be focusing on that. This post is going to go through a quick-walk through of collecting data from a system and using some tools to help parse out data that we want. This post will cover analyzing Prefetch files to determine when applications were run and what possible files of interest that the application(s) accessed. For this scenario I pulled the Prefetch files from a system that was infected with a ZeuS variant (md5: 611614c95937e1a53394d31a3c6e18be)

After we gather the Prefetch files from the system(s), we can start our analysis. In order to accomplish this, I wrote a small Perl script, which you can download here. (md5: 3f5f48f5bfe52d97a71d01b7874e94b8)(SHA1: c166f04b8130760ead947fb49d2919e40c65a93a)

The only non-standard module required to run it is IO:All, which is a great file system module that you should be using if you are not! Please feel free to make any modifications or adjustments to my code as well, but if you have any ideas for improvement please share!! I decided to take the time to write this script, rather than relying on other tools, for two reasons. The first is that I wanted to be able to try to pull out files of interest (files in user directories, temp directories, files ending in .txt and .dat, etc.) quickly rather than having to sort through lots of text. For example, the output of the raw data (954KB) is quite a bit more than the possible files of interest data (160KB). 


File size comparison of all Prefetch file data (-alldata), compared to files of interest (-foi), run with no flags (which happen to be the same size in this case) and Prefetch file metadata (-pfmetadata). Hooray data reduction!

The second reason is that I often try to carve Prefetch files from unallocated space in an effort to try to determine historical execution times and I haven't found a tool that will parse partial Prefetch files that well (you can run my script with the -pfmetadata flag and it will only pull out filenames, OS version, times run, and last run time(s)). This can be useful when trying to determine possibly how long something had been present without solely relying on system timestamps.


My Excel Prefetch entries on a Windows 8.1 laptop

As we go through the output of the script, one item in particular interest jumps out as being strange. There is a file named "PO.exe" that was executed one time under the file path "\DEVICE\HARDDISKVOLUME1\USERS\ROCKET_RACCOON\APPDATA\ROAMING\TUTMGIFSFYPBW\PO.EXE". 


PrefetchIOC-parser.pl file of interest output for "PO.exe"

This seems like an oddly named folder, so I browsed to that directory and, sure enough, I found a file named "PO.exe" under that path.  I also found a registry entry for "PO.exe", under the "HKCU\Software\Microsoft\Windows\CurrentVersion\Run\PO" path, which is a method of persistence that both malicious and non-malicious programs can utilize on a Windows machine. Additionally, a check of the hash on VirusTotal shows that the file is indeed malicious. 

38/48 detection ratio, from 5 months ago!


Taking a look at Prefetch files can lead an examiner in the right direction of trying to determine if a device is compromised or not. While it is not always a 100% definitive answer, looking at Prefetch files can be a another method that an examiner can use when trying find the evil that may reside on a device. It is part of the reason that I included Prefetch file copying in my Windows Live Response tool set. I hope that this quick walk through has been insightful and hopefully you can try to use a similar methodology on cases you may encounter! 

PS: Be sure to make a copy of the contents of the Prefetch folder and run the script against that location. It will not work against the contents of the Prefetch folder on a live machine. Once again, why I included Prefetch copying as part of the Windows Live Response tools!


Some quick "lessons learned"

$
0
0
My little corner of the Internet has been quiet for a few weeks as I have been involved with some case work. One of the things that I try to do on every single case that I work is not only learn from it, but also to share what I have learned so hopefully if someone encounters the same issue(s), there is at least one resource that they can go to (hopefully more, but sometimes that is unfortunately not the case).

Two tidbits of information that I want to highlight from this care are:

1) Ensure that your tool(s) recognize the data they are trying to parse 
2) SQLite queries can be your friend. Or your enemy. But try to make them your friend


"Ensure that your tool(s) recognize the data they are trying to parse"

This issue came up when I had the joy of parsing several gigabytes of data from iOS backups, going back as far as 2007. Now, as you may or may not know, the iTunes MobileSync backup data structure has gone through several changes during the course of their existence. Originally the data was saved as ".mdbackup" files, which contained some header information at the very beginning of the file. Then iTunes moved on to a combination of .mddata and .mdinfo files, where the header information was contained in the .mdinfo file, and the actual data was contained in .mddata files. Then they did away with file extensions completely, which is where we still are today (The fine folks over at AppleExaminer have a nice post on the older backup structures, you can read it here if you wish.

Since the backup structure is very widely known and has been around for a long time, I figured that commercial tools available on the market today could handle the backups with no problem. What I was very surprised to find out is that, in fact, processing them is a VERY big problem! On this particular case I used AccessData's MPE+ to process the backups. It did a fine job on the "newer" files, however, the older data (I believe it was not only the .mdbackup files that it had an issued processing and that it was also the .mddata/.mdinfo files, but I didn't take the time to do additional research because once a tool was confirmed as not pulling out the data, I move on to something that can).

In the end, I ended up using MobileSyncBrowser (available for $20) and an old Perl script I wrote when initially performing iOS backup research to ensure the results were valid. MSB is, in my estimation, a very under-appreciated tool that everyone performing mobile forensics should have in their toolkit.

Tweeting about my experiences with MPE+


"SQLite queries can be your friend. Or your enemy. But try to make them your friend"

This statement partially falls in line with my aforementioned problems with the iOS backup parsing, but it also applies to SQLite data in general. You should be aware of how to pull at least some, if not all, of the data that your tools "extract" from SQLite databases to ensure they are working properly and not, for example, adding an additional seven days to a time stamp or anything like that. You do not need to know how to get the 100% same result (although, admittedly that can benefit you greatly if you do know how to get the same result) but at least having the capability to run "SELECT * FROM Messages" in a SQLite browser will go a long way in validating tools, techniques, and processes.

On an unrelated note to iOS backups, I also found the parsing the database file "Envelope Index" (and subsequent files) on OS X to with some SQLite to be incredibly helpful. While I am sure there are better ways to parse the data, this statement allowed me to quickly get an idea for email addresses/subjects/dates to be looking for with regards to potential items of interest. I couldn't find any SQLite queries online to extract this data, so if you know of a better way to parse it, please do share!! You can throw some LIKE statements in there toward the end as well, particularly in "addresses.address", to try to find email addresses of interest.

SELECT addresses.address as "Email Address", addresses.comment as "Display Name", DATETIME(messages.date_sent, 'unixepoch') as "Date Sent", DATETIME(messages.date_received, 'unixepoch')as "Date Received", DATETIME(messages.date_last_viewed, 'unixepoch')as "Date Last Viewed", messages.subject_prefix, subjects.subject, messages.snippet FROM recipients LEFT JOIN addresses ON recipients.address_id = addresses.ROWID LEFT JOIN messages ON recipients.message_id = messages.ROWID LEFT JOIN subjects ON subjects.ROWID = messages.subject ORDER BY messages.date_sent ASC 


Basic Envelople Index SQLite query


Always ensure that you know what your tools are doing behind the pretty GUI. "Trust but verify" is a term that it used a lot in our field and verifying the results can make a HUGE difference in the overall completeness of your forensic examination!!


Announcing OSX Live Response bash script (and updates to Windows Live Response too!)

$
0
0
Good news everyone!! After having some time the past couple of weeks to work on my Live Response automation project, I am happy to announce that a bash script, for running on OSX machines, is available in the latest download! The script focuses on gathering data from the following areas:

BasicInfo

  • date
  • hostname 
  • who 
  • ps auxwww (List of running processes)
  • mount  (Mounted_items)
  • diskutil list 
  • kextstat -l (Loaded kernel extensions)


UserInfo

  • /etc/passwd
  • /etc/group
  • .bash_history
  • .sh_history
  • AddressBookMe.plist


NetworkInfo
  • netstat -an
  • lsof -i 
  • scutil --dns 
  • netstat -rn
  • arp -an
  • ifconfig -a 
  • ifconfig -L
  • /etc/hosts.allow
  • Wifi connections
  • Firewall Configuration
  • NAT Configuration
  • SMB Configuration


PersistenceMechanisms
  • LaunchedLogInItems.plist
  • loginwindow.plist
  • User Launch Agents
  • System Startup Items
  • Library Startup Items
  • System Launch Agents
  • System Launch Daemons
  • Library Launch Agents
  • Library Launch Daemons
  • Application LogIn Items

Logs
  • copying all log files from /var/log/
  • copying all log files from /private/var/log/

The following steps is the methodology that I recommend to run ths script:
  1. Place the script on an external drive
  2. Insert drive to your OSX device
  3. Open Terminal
  4. cd to the device (for example, cd /Volumes/MORANHD01/LiveResponse/OSX_Live_Response)
  5. Run the bash script ("./OSX_Live_Response.sh")
  6. Profit!!

When the script is complete, it will hash the output of all of files (MD5 and SHA256) and store that in a separate text file for your viewing/parsing convenience. The script has not had the extensive testing that the Windows Live Response script (simply because I do not have access to a wide range of OSX systems) but in the testing that has occurred I (and others) have not encountered any issues. If you do, please let me know and I will try to update the script accordingly. If you also have suggestions and/or improvements to the script, please let me know that as well!!


Windows Live Response Update!!

I am also very happy to announce that I have modified the Windows Live Response script as well, it includes the latest version of PEStudio (8.12 as of 19 March 2014). In addition, the output of the script is also stored in a folder structure that makes going through the output a little easier and the collected data is also automatically hashed. I also changed the autorunsc command syntax to produce better results...more on that in my next blog post!


LiveResponse.zip - download here

md5: 8a34559b4c681fa37bf608187daf07d0
SHA256: 2791d029f16227c82af65ce658016fb758242cca46bf3aa4750cd2d0be1dceff


Upload Date: 16 October 2014


(NOTE: The original upload of the OSX script, version 1.3, had a pathing issue that was pointed out to me by Cristina Roura. The download link has changed, as the script has been updated to version 1.4 to fix this issue. It was an oversight on my part as I made the folder output the same for the Windows collection and the OSX collection, but forgot to update the pathing accordingly in the script itself. Also please notice, the hashes of the file have also changed. I am truly sorry for any inconvenience that this may have caused!) 


For the keen observers, you will note there is a "nix" folder in the Live Response zip file. My goal is to get a *nix version of the script working in the very near future so that way you can download the LiveResponse.zip file and have something to deal with any system you may encounter. I have several items on my "To Do" list regarding the script(s) but if you have any ideas or feedback please do not hesitate to let me know!


Windows Live Response collection vs. JackPOS

$
0
0
The primary reason on why I took the time to put together the Windows Live Response tool collection is that I got to the point where I was experiencing the same things over and over again and I wanted an easy way for either myself or anyone else to be able to collect this data in an easy fashion. While combing through the output of the script itself may not solve your case completely, it does have the potential to help point you in the right direction very quickly and can greatly reduce the size of the haystack in which you are trying to find a needle.

As long-time readers of my blog know, I have a second-hand system that I like to do a lot of my malware and tool testing on that I affectionately call my "Malware Box of Evil". For this example, I installed a malicious file onto the system and ran the Windows Live Response tools.

One of the first things that I like to look for on a system are persistence mechanisms. This could be slew of different items, such as a registry entry, scheduled task, installing as a service, etc. For this case, I opened up the "PersistenceMechanisms" folder and took a look at "autorunsc.txt"

Data contained in "PersistenceMechanisms" folder in Windows Live Response collection


The batch script is written so that autorunsc.exe runs with the "* -a -v -m -f" options:

* - prints data for all users
-a - shows all entries
-v - attempts to verify digital signatures
-m - hides signed Microsoft entries (NOTE: I include this to try to limit the sheer amount of data that is shown as Windows runs a LOT automatically. Even if malware is a signed Microsoft entry it "should" show up in other output from the Live Response tools. I haven't encountered that yet, but I am well aware it could be an issue)
-f - prints hashes of files

After opening our autoruns file, there is one entry of particular interest here, namely one for a "Java SE Platform Updater". The two main reasons that it jumps out of interest to me are that the version is apparently 1.0.0.0 and the company name is "K-Software". While we all know Java has its short-comings (and there are many) I would be very surprised if "K-Software" was a legitimate name associated with Java.

Autorunsc output 


One of the nice features of autorunsc is that it can also give the hashes of files that have been identified by the tool. A quick search on just the hash reveals quite a bit of interesting items on the first page alone.


Searching for the md5 of the file


Of course, of particular interest is a VirusTotal entry, which tells us that 28/48 engines identified the file as malicious.

VirusTotal results on file (captured on 19 March 2014)


But what if I didn't have internet access from wherever I gathered this data? Fortunately, there are some other items in the collection that can help you highlight "abnormal". One of my favorites is the "Installed Software" output from running WMIC. 

Installed software from WMIC

One of the items that I want to highlight here is that out of all of the applications installed on my machine (admittedly, there are not many as it is a stand-alone system), Java is not one of them. This is not a 100% sure-fire method to highlight potential evil, however, it can once again help lead you in the right direction (for example, DeepFreeze is installed on the system and it does not show up here.)

What if the malware was a little more advanced and purposely disabled some tools, like anything from sysinternals,  and ended up preventing them from running on a system? Well, that is part of the reason that I try to pull the data using a couple of different mechanisms. If a certain tool or process fails, hopefully one of the other ones will pull out the data. In this case, we turn to the output from WinAudit. The output shows us the same autorun entry, as well as the running service again with the "K-Software" name and "1.0.0.0" version.

WinAudit startup programs

WinAudit running programs


So hopefully this brief example helps highlight just how beneficial having something like the Windows Live Response collection can be. We didn't even look at the executable file itself; we simply are able to highlight some items of interest and do our best to try to identify "abnormal" as quickly as possible. I tried to make the script's data output as basic as possible so that anyone can open them and view the data with ease. 


LiveResponse.zip - download here

md5: 8a34559b4c681fa37bf608187daf07d0
SHA256: 2791d029f16227c82af65ce658016fb758242cca46bf3aa4750cd2d0be1dceff


Upload Date: 16 October 2014


Brief Windows Live Response Tool Collection Walkthrough

$
0
0

As many long time readers of this blog know, one of my goals has been to put together a Live Response tool collection that helps IT professionals/Incident Responders/GeekSquad employees/etc. be able to quickly perform some volatile data collection in an automated fashion. The topic of today's post is to create a small walk-through guide of how to accomplish this collection from start to finish on a Windows system.

The first step is to ensure that you have downloaded the latest copy of the Live Response zip file. I updated the zip file today (2 April 2014) with PEStudio 8.17 (http://www.winitor.com/) in order to perform some malware information gathering on-site if needed. (Marc has put a TON of work into his tool and if you are performing any type of malware analysis and you are not using it, you should add it to your toolset collection immediately!)


LiveResponse.zip - download here

md5: 8a34559b4c681fa37bf608187daf07d0
SHA256: 2791d029f16227c82af65ce658016fb758242cca46bf3aa4750cd2d0be1dceff


Upload Date: 16 October 2014


Once you have the zip file downloaded, you should extract it to either the system you want to gather the information from or (my preference) an external USB device. Once you have extracted the file, navigate to the Windows_Live_Response folder. Inside this folder you will see a bunch of folders that contain the tools that we are going to leverage, as well as the file "Windows_Live_Response.bat". 

Contents of Windows Live Response folder

You have two options with this, you can either click the batch script which will run it with "normal" privileges (on Windows Vista and newer, this means not as an Administrator, on XP it runs with Admin privileges). You can also right click on the batch script and choose the "Run as Administrator" option.

Choosing to run script with Admin privileges on Windows 8 Pro device


If the script is run with the elevated privileges, a memory dump will automatically be created using the Belkasoft Ram Capture tool, Prefetch files will be copied, Last Activity View will run, netstat -anb will run, and an nmap scan of your default gateway will occur. If the script does not run with the elevated privileges, those items will not run (the script determines if it has elevated privileges or not).

The script will automatically create a folder within the "Windows_Live_Collection" folder that contains the computer name and the time that the collection occurred. This is to help users establish baseline activity as well as if you run the script multiple times on the same system.


Computer name and date are the name of the automatically created folder!

Once the script is complete, you are prompted to press any key to continue. 


Waiting to continue...


This helps ensure that the script has actually completed, rather than not displaying everything and potentially having the drive moved during the middle of the collection. The files are saved in the following folder structure:


Folder structure of Windows Live Response collection

"ForensicImages" -- This folder contains the memory dump (if made) which is stored in the "Memory" folder, and a "DiskImage" folder for storing the disk image if you so desire.


Contents of "ForensicImages" folder

"LiveResponseData" -- This folder stores the output of the tools and script, under the sub-folders:

  • "BasicInfo" - Information about the system
  • "NetworkInfo" - Information about the network
  • "PersistenceMechanisms" - Things that are set to run on the system (possible hiding location(s) of some malware
  • "Prefetch" - Prefetch information (for more on this, please read my earlier blog post HERE)
  • "UserInfo" - Information about the user(s) 

Contents of "LiveResponseData" folder

Lastly, there is a file named "Processing_Details_and_Hashes.txt". This file lists the md5 and SHA256 hashes each of the files in the LiveResponseData as well as the entire memory capture (if created). The script saves most of the results as text files, so you can import them into whatever tool you desire to view the results. You can also just use notepad and open up the files as well, the methodology of analysis is completely up to you.


Partial list of hashes in "Processing_Details_and_Hashes.txt" file created by Windows Live Response collection

Hopefully this small walk-through helps guide you through the steps that I take in order to leverage the Live Response tools on engagements. If during the usage of the tool you notice something is amiss or would like a feature(s) added, please let me know. I don't want to include anything in here that a user has to pay for, so please make sure the tool is completely free. If it is a commercially available tool, perhaps we can come up with a solution to produce something similar with a built-in command or another freely available solution.


Updates to the Windows Live Response tool collection

$
0
0
Good news everyone!! I found some time during the early part of this week to make a couple of updates to the Windows version of the Live Response tool collection. 


The first update is Pinpoint Version 0.2.0 (which was actually released back in February) from Kahu Security. The tool is great for helping to identify possible malicious content on a webpage. The following description of the tool is taken directly from website:

"Fetches a webpage and then enumerates and analyzes its components to help identify any infected files. Pinpoint gives you various options when making an HTTP request including spoofing the user-agent string and referer. Pinpoint will not render any of the content."


The second update is PEStudio, from Marc Ochsenmeier, who has been EXTREMELY busy pushing out updates to his amazing tool. The most recent update to PEStudio has "extended blacklist and Features detection as well as fixing a bug when handling 64-bit images". Marc has also set up a Paypal donation option on his website, if you have used PEStudio to help with any of your analysis and/or research I encourage you to consider donating as a way of saying "Thank you Marc!" for all of the time, effort, and work he has put into PEStudio. I would gladly pay for a tool like PEStudio, but am very grateful that Marc offers it for free!


The third update comes as a result of using the Live Response collection in a real-world response case. After being alerted to some possible files of interest that were identified by the other tools in the script, I wished that I had the hashes of some of those files to perform some additional research to attempt to determine if those files were legitimate Windows files or if they were malicious but attempting to "look" like Windows files. If run with Administrative privileges, the script will now compute the md5 and SHA256 of Windows PE files in the "%WINDIR%\system32" folder and "%SystemDrive%/Temp" folder (if it exists). It will also compute the md5 and SHA256 of all of the files in the "%TEMP%" folder of the currently logged on user. (COMMENT: I am working on doing this for each user of a system, I need to do some more testing in an effort to perform this in the most efficient (least system intensive) way possible).


I hope that you find the update(s) useful and as always, if you come across anything to help make the collection better or if there is a feature or option you would like to add or see, please let me know! 


LiveResponse.zip - download here

md5: 8a34559b4c681fa37bf608187daf07d0
SHA256: 2791d029f16227c82af65ce658016fb758242cca46bf3aa4750cd2d0be1dceff


Upload Date: 16 October 2014

You don't know where that device has been...

$
0
0

The topic of this blog post, device geolocation, is one of the areas that I enjoy researching but, unfortunately, it is one that I do not have to use very often. Specifically, we are going to delve into the data contained within the Windows Event Log "System.evtx" file that is present on Windows Vista and later systems. 

(COMMENT: I did this on my own live system, but the exact same method applies while digging into your traditional "dead-box" system).

First of all, we are going to use the Windows Event Viewer to open up our System Event log. Once you have the Event Viewer program open, navigate to the "System" event log. What you see should look very similar to what is pictured below:


Windows Event Viewer


Once it is open, the easiest way is to search for the Event ID "6100" (Diagnostics-Networking). You can double click on the Event ID tab and it will sort for you. The default size limit of the Event Logs is capped at 20MB, so it may take a few seconds to sort it. Once it is sorted, you can navigate down to the 6100 events. The one that we are interested in starts with "Details about wireless connectivity diagnosis". The 6100 events have different data, but we want the one that starts with that line and contains a listing of all of the visible networks the device can see. It should look something like this:


System.evtx Event ID 6100


Now that we have the MAC addresses and network names associated with the device at the timestamp of the 6100 event, we can attempt to geolocate the MAC address of the BSSID(s) in question to try to determine where the device was. The SSID name will probably not always be as straight-forward as "Ripley's at Inner Harbor Baltimore Maryland", so we have to dig around a bit in order to find this data. I've used both the Google API and the Skyhook API in the past for this correlation, but for this example I used WiGLE (https://wigle.net/). You may have a "go to" source for geolocation that could be different and/or better, but once again, the methodology that we are going to follow is the same.

I took the list of BSSID MAC addresses that were listed in the 6100 event and searched WiGLE for each one of them. I only got two results, one on the SSID "WYHP4" and one on the SSID "4ZNNF". 


WiGLE results for "WYHP4"


Google Maps search for coordinates provided in WiGLE search for "WYHP4"


WiGLE results for "4ZNNF"

Google Maps search for coordinates provided by WiGLE search for "4ZNNF"


Based off those results, on 11 March 2014 at 19:48:06, my device was located somewhere in that area determined by plotting those two locations. My actual location was is the small suitcase icon in the middle of the photos, but it is definitely close enough to determine, roughly, where a device was. With better tools and methods (in my experience, Skyhook is REALLY good but it is not as easy to demonstrate as WiGLE) it is possible to refine the location even more accurately!

Hopefully there are many, many more hits for the networks that you can see while performing your search, but this method can prove to be very helpful when you have evidence that a device is  connected to a network, but have no location data on that network. If you can find other networks the device could see but did not connect to during that same time, it increases the chances of being able to roughly figure out where a device was as a particular time. The same methodology can be (and is) used with mobile devices and cell tower data. There are PLENTY of articles about cell tower locational mapping, if you would like to read more about that I recommend looking up that information via your search engine of choice!


A couple more thoughts to consider as well:

 - Within the event log itself, you can search for the term "BSSID". That seems to be a constant in every language, so if your system was set to Arabic for example, the Event ID should be the same, but you can just use your evtx parser of choice  and search for Event ID 6100 and BSSID for a listing of the networks (I prefer the EVTX Parser by Andreas Schuster for this purpose, just look for "/<EventID>6100<\/EventID>/" and "/BSSID\t\t/" (Perl regular expression matching))


 - The events themselves seem to be generated when there is a connection issue of some sort, so you need "something" to have occurred in order to generate the event data (in other words, you have to be lucky enough to have it happen during the time-frame that you are looking for. The wireless network information is probably available in a memory dump too, I haven't had the time to dig through that as much as I would like yet. I have a hunch that it is in there somewhere, just not sure exactly where it is!) 

ZeroAccess, Windows command line code pages, alternate data streams, spaces in file paths, and more. Also an update to the Windows Live Response collection!

$
0
0

Good news everyone!! There is a lot to cover in this blog post, so please ensure your seat belt is securely fastened because it is going to be one heck of a ride!

All of the items in this particular blog post came about as I was messing around on the Malware Box of Evil with a ZeroAccess rootkit sample (you can read more about this sample here). Many months ago, back when I used EnCase to perform my analysis, I wrote an EnScript to digest file paths when searching for Unicode characters in file paths. (I have since moved on an use X-Ways pretty much exclusively as it is a MUCH better tool than EnCase. I, for one, welcome our new X-Ways overlords! ) I wanted the Windows Live Response script to perform similar functions to highlight files and directories of possible interest and save that output. What I didn't realize is how much research, frustration, alcohol, and eventual joy and happiness this process would involve.


Windows Code Pages

The first thing that I encountered was the Windows Code Page. There are many, many different code pages, but on US-based, English systems, the default code page used by the Windows command prompt seems to be 437 (MS-DOS Latin US). You can open a command prompt and see what code page it uses by typing the command 'chcp'. What this means for the typical user is, even if you have installed different language packs to view files/languages on your US English Windows system, when you view those files from a command prompt you are likely to see "????" instead of "папка" (a Russian word for "folder")


Command line view and Windows Explorer view of "папка"folder. The Active code page is 437.


So I updated the Windows Live Response batch script to perform a directory listing and then use the built-in Windows command "findstr" to look for anything with a "?" in the output. While it may produce a lot of results, especially if you have a lot of files/paths in other languages, it should help you to determine some areas of interest in which to look.


Alternate Data Streams

As I got to thinking about this particular ZeroAccess sample, the more that I realized simply finding Unicode in filepaths wouldn't be enough. What if the sample you are trying to detect doesn't use Unicode in the file path, such as the one in this writeup? What if it just utilizes one of the main indicators such as an Alternate Data Stream (ADS)? (I won't go into detail on Alternate Data Streams in this post but there are several posts, such as this one, that you can easily find if you want to learn more). Starting with Windows Vista, the built-in Windows "dir" command has a "/r" option that allows you view Alternate Data Streams. 


"dir" command options for Windows Vista and later. Retrieved 14 May 2014 from "http://blogs.msdn.com/b/junfeng/archive/2006/04/21/580285.aspx"

This is an outstanding feature, however, the "dir" command on Windows XP systems (which I know are still in use <sad face>) does not have that option. Fortunately Mark Russinovich released a tool in the Sysinternals Suite called "streams" which works on Windows systems, including Windows XP. I have updated the Windows Live Response collection to include this tool and the script will now search the %HOMEDRIVE% for Alternate Data Streams. The output of streams.exe also includes the "." character to show that it is working. So be aware that you may end up with file paths that look like they contain Morse code (for example, the screenshot below contains "..." before the path). This is a result of the tool output and can easily be cleaned by the end user, if they so desire.


By combining the findstr "?" search and the Alternate Data Stream search, we can clearly see possible evidence of a ZeroAccess infection on the Malware Box of Evil.


Alternate Data Stream search and possible Unicode search results


Spaces in file paths and environment variables to help

As I was running/working on the script, I realized that the entire batch script had a potentially serious issue. I have always tried to save files connected by underscores or dashes and never until my most recent round of testing did I contemplate "what if the user had a space in the file path"? This was particularly highlighted by placing the collection on the "Documents and Settings\<USERNAME>\Desktop" of a Windows XP system. While a majority of the commands worked OK with the "%~dp0" variable, some did not, and one command not working properly makes me unhappy. So after quite a bit of trial and error, I realized two things about the Windows command line interface:

1) You can escape characters using the caret "^" symbol. However, if you use the caret symbol as an escape character, you cannot place that command in either single or double quotes.


What works and what doesn't work with space on the Windows command line


2) The variable "%~dps0" gives the file location of the batch script, but uses the "short" file/path name method. So it is a built-in way to allow for spaces in the name. I wish I would have figured that out early on before devoting a lot of time and effort, but it was a great learning experience and I learned a lot of  "what not to do" and hopefully sharing my experiences will help you during the course of your research/investigations.


Batch script output using %~dps0. Note the ~ in the paths instead of escaped spaces


Lastly, updates to the Windows Live Response collection

All of these items that I covered in this post have found their way into the updated version of the Windows Live Response collection. I also included the most recent version of PEStudio (8.26) which you can download from Marc's website


LiveResponse.zip - download here

md5: 8a34559b4c681fa37bf608187daf07d0
SHA256: 2791d029f16227c82af65ce658016fb758242cca46bf3aa4750cd2d0be1dceff


Upload Date: 16 October 2014


Bluetooth for data exfiltration. Say what?!? Part 1: The Setup

$
0
0


One of the things that I absolutely love about the DFIR community is the amount of communication and idea/information sharing that happens between members of the community. A few weeks ago Ken Pryor posed a question on Twitter regarding extracting data from a Tracfone. I shared my experience with using a Bluetooth connection to get a few files, and Harlan Carvey asked what experience we've seen with regards to Bluetooth data exfiltration. 

The Twitter conversation that started this post!


To date, I have not seen Bluetooth used for data exfiltration on a case that I worked, but since there is such a large crossover between personal mobile devices and the corporate environment, I was curious to see what evidence I could find of data exfiltration when I used Bluetooth to send a file from my laptop (running Windows 8.1) to my Galaxy Note 2 (running Android 4.3). 


I first had to pair the devices, which was accomplished by turning Bluetooth on (on both devices), and confirming on each device that I was indeed pairing the devices together. Once I paired the devices, Windows 8 presented me with the following console on my laptop:

Windows 8 Bluetooth console

For the purposes of this post, I created a TrueCrypt file named "exfil.doc" (for more on TrueCrypt, please visit my previous blog post). I opened the file in HexWorkshop to confirm the lack of a file header, the file size is cleanly divisible by 512, and the character distribution is 0.39%, which is exactly what I expected to see:


File header of "exfil.doc"


File size cleanly divisible by 512


0.39% character distribution in "exfil.doc"


Once I had my "document" ready to "exfiltrate", I had to choose the file to send using the "File Operations" option within the Bluetooth console

File Operations tab within Bluetooth console

I choose this one!


Once I chose the file, Windows queued it to transfer the file from my laptop to my phone. 

Bluetooth FileTaskManager waiting to transfer file


My phone presented me with a message that I had to first accept in order for the data to be transferred.

Bluetooth file transfer notification on Galaxy Note 2


And so it begins....


The file, which was 543MB in size, took about 55 minutes to transfer via Bluetooth. I was a little bit surprised that it took that long, but since I don't use Bluetooth on my laptop (in fact, with the exception of this post, I have it disabled) the slower speeds may have been caused because the drivers/software were not updated.  

Files sent to my Galaxy Note 2 via Bluetooth


On Windows 8, the "History" tab of the FileTaskManager window shows the history of files that are transferred. You can see my attempts to transfer files, and failed attempts as well. I am hoping to find this data either recorded on disk and/or within the memory dump from the system. This data can also be cleared by the user, so it may not always be populated.


FileTaskManager history

Part 2 of this post will include evidence related to the Bluetooth transfer that I find within the memory dump and drive image. As Harlan pointed out, at the very least there should be evidence of the Bluetooth connections in the Registry and within Shellbags. I am hopeful that there can be some evidence found on the device (and in the memory dump) of the actual file transfer itself, but I have to wait for the image to finish, load it up, and see what I can find!


Bluetooth for data exfiltration. Say what?!? Part 2: The results

$
0
0


*****SUPER IMPORTANT DISCLAIMER*****

The purpose of this blog post was an attempt to determine what artifacts are present when files are transferred between a Windows 8 laptop and a Samsung Galaxy Note 2. All items and data on this post are presented for educational purposes only.


***BEGIN NON-TECHNICAL POST SUMMARY***


Quite honestly, you should probably disable Bluetooth on every system and do everything that you possibly can to ensure that users/friends/enemies/nation states/etc have no way to initiate Bluetooth connections to anything in your environment (I would go so far as to uninstall the Bluetooth drivers, programs, etc.). There is VERY little evidence left behind of a Bluetooth file transfer and unless you have an extraordinary amount of oversight into your environment (let's be honest, that excludes 99.9999% of you) it is unlikely that you will be able to find concrete evidence that a Bluetooth file transfer took place. I knew EXACTLY what I "exfiltrated", exactly when I did it, and immediately created a memory dump, ran the Live Response collection, created a disk image, and honestly there are not a whole lot of artifacts present to definitively say I transferred anything from my laptop to my mobile device.

***END NON-TECHNICAL POST SUMMARY***


Hello and welcome to part two of a post that delves into the possibility of using Bluetooth for data exfiltration. This post is going to cover the evidence left behind when a user utilizes Bluetooth on a mobile device to exfiltrate data from a system. (I highly suggest reading Part 1 if you have not already).

Remember, this exercise was performed using a laptop (with internal Bluetooth) running Windows 8.1 and a Samsung Galaxy Note 2 (running Android 4.3). Your individual mileage and testing may vary.


The first thing that I would like to highlight on the Windows system is after a successful Bluetooth connection is established, a new folder titled "Bluetooth Devices" is populated within the "Programs" folder. This folder does not seem to appear to the user unless a device is connected. 


Bluetooth Devices folder on Windows 8 (Note the capital "BL" in Bluetooth.  Programmers don't use spell-check!)

Naturally this is interesting and clicking on the properties of the folder reveals the following "target" of the folder. It appears that the program "Win7UI.exe" (Full Path: "C:\Program Files (x86)\Bluetooth Suite\Win7UI.exe") was run on the system with the argument "50:32:75:98:af:0a" (which unsurprisingly, is the Bluetooth MAC address for my Galaxy Note 2)


Bluetooth Devices "Target" details. Again, Bluetooth starts with a capital "BL"


Upon connecting the device, Windows also creates a .lnk file (on my system, under the path "C:\Users\Brian\AppData\Roaming\Microsoft\Windows\Start Menu\Programs\BT Devices" that appears to be the device name (once again, in my case SCH-I605.lnk). The description of the link file is Win7UI, which is the executable file in the Bluetooth Suite that was run along with the Bluetooth MAC address of the device. Although the created time was updated for the most recent connection, the modified time was the very first time that the connection was established. 

Properties of the .lnk file


Another very important item that I want to highlight is the "History" within the FileTaskManager. While I discussed in the previous post that a history is maintained, it appears that the History only lasts for each session in which the device is connected. In other words, once the Bluetooth connection is lost, the History option within the program itself is also lost. 

The history is cleared upon a new connection


Disk artifacts

I was more than a little surprised when I did not find much evidence in the way of artifacts on the disk itself, with the exception of two .lnk files and some items of interest within the pagefile. I am still working on going through all of the Registry data, but with the exception of showing evidence of files being accessed, there does not seem to be definitive evidence of file transfers.

Two .lnk files were created, both of which were named "SCH-I605.lnk".


"SCH-I605.lnk", found under the path "ProgramData\Atheros\Device link\18-67-b0-85-31-4b"


"SCH-I605.lnk" file under the path "Users\Brian\AppData\Roaming\Microsoft\Windows\Start Menu\Programs\BT Devices" (remember, you may not see this file and file location unless Bluetooth is turned on. Even if you browse from the command line!)

I used RegRipper 2014014 and pointed it at both the NTUSER.dat hive and the UsrClass.dat hive in hopes of finding at least some good information. Unfortunately, outside of Recently Accessed documents, there was no evidence of my file "exfil.doc" or the phone "SCH-I605" (now granted, this may be due to the fact I did this on Windows 8.1 and something may have changed format-wise; truth be told I haven't dug into Win8 shellbags too much yet)


Searching for "exfil.doc" in RegRipper UsrClass.dat output
Searching for "I605" in RegRipper UsrClass.dat output

The pagefile is where the most interesting items on the disk itself were located. The first was several instances of what appeared to be the title of the GUI that Windows presented upon making a successful connection.


Lots of SCH-I605 and MAC address hits. It looks an awful lot like the header of the Windows 8 Bluetooth console!
The title of this window looks familiar....

The second item of interest was what appeared to be evidence regarding the initial connection setup. 


Possible references to the Bluetooth connection


Memory artifacts

Briefly covering some strings of interest in the pagefile sets up perfectly for transitioning into memory analysis. Volatility does not have yet support for Windows 8 memory dumps, so the amount of memory analysis that I can currently perform on the dump is limited to some archaic methods such as strings and contextual analysis. Once Windows 8 processing is supported I plan on revisiting the memory dump analysis, but for now the strings/contextual analysis will have to suffice.

I searched across the memory dump for "SCH-I605", "exfil.doc", "FileTaskManager" and the time stamps listed in the History tab of the FileTaskManager. Once again, I was a little surprised by how few results I got, but there was one item of particular interest that was not present in the pagefile.

There appeared to be a possible reference to sending the file "exfil.doc" at 5/20/2014 3:33:45. This is the only POSSIBLE (possible because it really doesn't give definitive proof) evidence that a file was sent. I couldn't find anything else regarding the other timestamps in the memory dump. I am kicking off a regular expression match across the entire contents of the disk image to see if anything else matches this particular timestamp pattern, but in order to keep this post at least relatively timely, the results will have to wait for a later post.


Possible begin to send file information on "exfil.doc"


Windows Live Response collection artifacts

I also ran the Windows Live Response collection against the drive and had some interesting results in three files, specifically cports (open ports), running processes (expected) and Last Activity View (expected). 

Running processes showed both FileTaskManager (BtTray.exe) and SCH-I605 (Win7UI.exe). I expected both of these to be seen based on the other data that we have uncovered so far


Running processes items of interest


Last Activity View showed that the system ran Win7UI.exe. It also showed the "Select file in open/save dialog-box" and "Open file or folder" descriptions without any additional activity occurring. Normally one would expect to see Word (or some other program) immediately following that selection, but in this case we see nothing. So perhaps the absence of "normal" items in Last Activity View may tip you off.


Last Activity View items of interest

The item that was most interesting is cports, but upon thinking about it more it makes total sense.  Honestly it might be the only indicator  you could reliably "catch". On top of transferring files, the basic, default, generic settings on Windows 8 allows the user to not only transfer files, but also to send SMS messages, make phone calls, sync contacts, etc. It seems that the system also uses a TCP connection with the phone to do this rather than relying solely on a Bluetooth connection. Some more testing is needed, but unless the phone is connected via Bluetooth I do not see any connections between my system and my phone.


Modified cports data. FileTaskManager and the SCH-I605 connections are of note!


Some Windows 7 items

Presently, I do not have access to a physical device running Windows 7, so I reached out to my good friend Mari DeGrazia who took some time out of her busy schedule to help see if similar items were on her Windows 7 device. One of her systems used a Broadcomm Bluetooth adapter (both of my Windows 8 boxes use an Atheros adapter) and the pathing and executable was slightly different. I am planning to take a similar in-depth look on a Windows 7 box as soon as time and resources permit, but here is a preview.

The creation of a .lnk file for a Bluetooth connected device is the same, however the location of the application is different. On this particular box it is C:\Program Files\WIDCOMM\Bluetooth Software" and the application is "BTWUIExt.exe". The application is run with the argument "/deviceADDR=001122334455", which is the Bluetooth MAC address. It looks like the link files follow the same time stamp format, with the modified time being the date/time of first connection and the created/accessed time stamps being the most recent time when a connection was established.

Windows 7 (Broadcomm adapter) link information. Device name and MAC address modified


The final takeaway

Unfortunately, it looks like it is going to be EXTREMELY difficult to detect actual data exfiltration via Bluetooth. However, there are a couple of items that you can look for on a system in an effort to try to determine if additional questioning and/or searching is required. The main items of interest to look for this far are:
  • The execution of "Win7UI.exe" (or BTWUIExt.exe, or a similar program on your system(s))

  • .lnk files containing mobile device IDs, especially those located in the "BT Devices" folder (and/or the applicable Bluetooth adapter folder)

  • Strings within pagefile/memory dump that contain the device ID and/or Bluetooth MAC address of the device (make sure you take into account different formats/regular expressions!)

  • Look for the filename(s) you think may have been transferred in the memory dump and Registry

  • Pay attention to "FileTaskManager" using higher TCP ports

  • Pay attention to TCP ports being used by a device model/MAC address combination

  • If you run Last Activity View, look for abnormal usage patterns such as Open/Save dialog boxes with no discernible idea of what opened/modified that file (or created the box to open in the first place) 


Bluetooth for data exfiltration. Say what?!? Part 3: Do you want "TCP" with that?

$
0
0
Please read Part 1 and Part 2 prior to reading this post, as some of the items that are contained in this post are covered more in-depth in the previous posts. I wanted to dig a little deeper into the Bluetooth file transfer to see if I could find some more information. As Micah Norman pointed out, "Knowing Windows, there has got to be something else juicy...". I think that most members of the DFIR community are surprised that there isn't more information stored by the Windows with regards to Bluetooth file transfers. 

So I decided to treat it like malware, and used items like noriben and Process Monitor to try to dig deeper. While I still do not have definitive answers on finding evidence of file transfers, hopefully this can help "catch" and "detect" the possibility of Bluetooth file transfers in your environment.

noriben

I expected to have to go through a lot of data contained within the text file output of noriben and I was correct (the file size was 706KB). I could have taken the time to try to filter that data down more but it was just as fast for me to compare the text file with the data within Process Monitor itself, so additional filtering wasn't needed in this case. noriben showed the creation of the processes that I previously covered, but I was surprised to see how little "file" activity actually occurred during the transfer. This falls directly in line with the analysis findings on the disk image, and it appears that most of the data of interest is contained within the memory related files (pagefile, memory dump, etc.).

The cleverly named folder "Bluetooth folder" was created in "C:\Users\Brian\Documents" but there did not appear to be additional data stored in that folder. The file "BtvStack.exe" appeared to be involved with the creation of the "BT Devices" folder so that needed some more investigation too.

Filtered file activity from noriben


noriben also showed a TON of Registry activity, primarily regarding MRU, lnk files, and ShellBags (once again, it is what we kind of expected to see)


Snippet of Registry activity from noriben

Noriben did also show the TCP connections that cports highlighted, so I wanted to use the output of Process Monitor to dig into that a bit more.


Process Monitor

Having identified the main processes of interest in noriben (Win7UI.exe and BtvStack.exe) I filtered the ProcessMonitor output on those two process names. Using the timestamp correlation, it appeared just before the files were sent, a Registry value that is possibly associated with Bluetooth Quality of Service (if my acronym breakout is correct) occurred:

Contents of Process Monitor just prior to sending the file "pandamonium.gif" via Bluetooth


I know that there were TCP connections made from the cports output but ProcessMonitor allowed me to see the actual Send, Copy and Receive operations that were occurring. BtvStack.exe appeared to be reading the file "pandamonium.gif" 4096 bytes at a time. BtvStack.exe also appeared to be sending the data while Win7UI.exe appeared to be Copying and Receiving the data.

Totally Tantalizing TCP activity Batman!

Oddly enough, when I set up a Wireshark capture on my system (on all available interfaces)I did not see any evidence of this activity occurring. cports showed the open ports and Process Monitor showed the TCP transfers, but a Wireshark capture did not appear to see it.


So what does this mean? Quite honestly, I am not 100% certain, and I hope that someone more knowledgeable than I in the ways of network connectivity and protocols can shed some light on the subject. I have a hunch that since the TCP command appears to be from my device to my device Wireshark doesn't process it (once again, I am not certain) or it could be that Windows is misidentifying a Bluetooth connection as TCP, and what both Process Monitor and cports recognizes as a TCP connection is really a Bluetooth connection. Or maybe it is a combination of the two.

In-depth network protocol analysis is not a strong suit of mine and I would really love for someone else to try to dig into it and figure out exactly what is going on here. In the meantime, the "TCP" connection monitoring appears to be one of the most reliable ways to be alerted of a possible Bluetooth file transfer, but even then you may not be able to determine exactly "what" may have been taken. You can use a combination of Process Monitor, Registry/Shellbag analysis, Last Activity View, memory analysis, string searches, lnk file correlation and a whole lot of timeline analysis to try to make an educated best guess.


Bluetooth for data exfiltration. Say what?!? Part 4: Some Registry artifacts

$
0
0

Hello again readers and welcome back to another post regarding evidence left behind during Bluetooth data "exfiltration". Today's post is going to focus primarily on Registry artifacts. 

First of all, I want to point out a post made by Russ Taylor regarding Last Modified time updates. The "Last Modified" time stamps on Windows system files are no longer updated like they "used" to be and it is entirely possible to have time stamps from Registry hives and Event Logs (among other files) that are in the past, but the files themselves will have entries from the "future" For example, my NTUSER.dat timestamp was 05/19/2014 at 14:45:17, but the hive had entries from 05/20/2014 15:20:55. Great Scott! <cue Back to the Future music>

NTUSER.dat timestamp shows the "Last Modified" time 05/19/2014 14:45:17

Software-Atheros-VistaAddOn-Devices NTUSER.dat key updated at 05/20/2014 15:20:55. Great Scott!

The issue of "normal" time stamp updating seems to have been first noticed with Windows 7 and  underscores the fact that a forensicator cannot simply rely on file system time stamps alone. In fact, with a couple of lines in PowerShell, you can change timestamps with ease: 

$file = (gi malware.exe);
$file.CreationTime = '8/1/14 12:00AM';
$file.LastWriteTime = '8/1/14 12:00AM';

(Props to Brian Baskin for these exact commands. You may see these again some day....)


(NOTE: I want to test the time stamps out using a program like Triforce to see what additional data it can provide. It is on my list of things to do!)


So, now that we have covered the time stamps next up is covering some of the interesting data contained within the Registry itself.

The first example is in the aforementioned NTUSER.dat hive associated with my user account (which is cleverly named "Brian"). There is quite a bit of data located under the "Software-Atheros-VistaAddOn-Devices" path that looks to be associated with the connection of my Galaxy Note 2 via Bluetooth. I have to dig into the data more (when time permits) to try to figure out exactly "what" information can be determined from the Registry entry(ies). It still doesn't look like there is any evidence of actual "exfiltration" but it is nice to have another item that seems to match pretty closely to the connected device times. 

The Software-Atheros-VistaAddOn-Devices key screenshot, again!

X-Ways Forensics (my forensic analysis tool of choice) also has the ability to carve entries from Registry Hives. This also needs some more digging, as it looks like it is an entry regarding the command and the arguments needed to initiate the Bluetooth connection.


"Path unknown" Registry entry, with Win7UI.exe and the SCH-I605 Bluetooth MAC address

The SOFTWARE hive also had some entries associated with the Bluetooth connection under the path "Microsoft-Device Association Framework-Store" path. This also requires some more investigation, but once again, it does not appear that this shows anything along the lines of exfiltration, but only connections. These timestamps are prior to the timestamps entries that were created in the NTUSER.dat hive.

SOFTWARE entries regarding the Bluetooth connection


So at least we have a little more data that helps correlate some of the connection times, but we still have not found anything definitive that proves "exfil.doc" was indeed transferred from my computer to my phone via Bluetooth. But, the search continues...


Parsing Windows Live Messenger data from iOS devices

$
0
0

Good afternoon readers, the past couple of weeks have been pretty busy with case work, but thankfully I finally had some time to dig in to some messaging data that I extracted from an iOS device that never seems to have been addressed previously and does not appear to be recognized by any mobile device forensic tools that I have used.

The application I will be covering in this blog post is Windows Live Messenger for iOS devices, which seems to have been discontinued some time in 2013. Unsurprisingly, the application is VERY poorly written and stores data on the device itself in a variety of different ways, which probably explains part of the reason that no one has really dug into this data. As the below image shows, there does not appear to be specific time stamps or even a definitive structure as to how data appears within the application itself, which makes extracting data MUCH more difficult.


Screenshot of Windows Live Messenger on an iOS device. Retrieved 7 August 2014 from http://news.softpedia.com/news/Microsoft-Discontinues-Windows-Live-Messenger-for-iOS-324028.shtml#


I would like to note though, that with all of the research, time, and effort that I put into this post and parsing the data from, I only have one device that has the application on it, so the data stored on a device you encounter may be slightly different. If you have a case where you have access to this data and are willing/able to share it I would much appreciate it in an effort to make the small Perl script that accompanies this blog post. Likewise, if you encounter issues with the script please reach out to me and I will try my best to help! So, now that all of the formalities are out of the way, shall we begin?


The Messenger data itself is stored in a standard location, under the "/private/var/mobile/Applications/com.microsoft.wlx" folder (or the applicable SHA value, if you have not used a tool/method to reconstruct file paths). 


Messenger application folder from iOS device when viewed in X-Ways

There is quite a bit of data in here, but for now we are most interested in files that are stored under the "Documents/cache/Messenger" and under the "Library/Caches/cache/Messenger" folders. It should look something like this:


Contents of "Messenger" folder. The files stored in "Documents/cache/Messenger" and "Library/Caches/cache/Messenger" following the same naming conventions, but contain different data.

The first thing that I want to point out here is that all of the files in these folders have a ".cache" file extension. But of course Microsoft does not follow a standard format for exactly what a ".cache" file should be, so the file header and footer for each of these files are different. The files seem to follow the naming convention of "MSN User ID_filename.cache". The data in the Message History of the files also appear to bring up the possibility that 7-bit encoding is in use, so that opens up an entirely new can of worms for parsing the data. Rather than reverse engineer the entire file structure format, I decided to focus on areas from which I could extract data and have relative confidence in the results.


No discernible, repeatable, standard file header. Foiled again! 


This seems to suggest 7-bit encoding might be in use, at least a little bit. Maybe. I don't know to be 100% honest. 

Thus far I have identified three files that contain chat and/or chat associated data of interest. The files contain "ChatConversations", "MessageHistory", and "Status" in the filename. The "ChatConversations" file seems to contain a listing of the most recent chat sessions, the "MessageHistory" file seems to contain most of the message data, and the "Status" file seems to contain email addresses and usernames of individuals involved in chat sessions as well as the username and email address of the individual who used the Windows Live Messenger application on the device itself. I will cover each of the files individually, but I would also like to note that the script can be given the "-folder" option and it will attempt to recursively (meaning all of the subfolders as well) search to find these files for you.


"Message History"

The message history files seem to follow the format of storing the data in the following format


  • User "Friendly Name" (if present)
  • Hex character 00 (can occur 1 or 2 times (usually if friendly name is present, but not always))
  • Number 1 
  • Colon
  • Hex character 00 (can occur 1 through 4 times)
  • Email Address
  • -- sometimes additional printed and non-printed characters --
  • Message
  • Variety of characters
  • Hex character 00 five times in a row

Since I have not found a reliable way to account for if the "Friendly Name" is present or not, I am going to focus on starting the pattern match with the number 1 and the colon, and then greedily match everything up to where the hex character 00 occurs at least five times in a row. The Perl regular expression that the script uses for this matching is:

"\x31\x3A([\w\W]+?)\x00\x00\x00\x00\x00"

Once the script matches that pattern, it then attempts to format the data structure by replacing the "1:" with the term "Email Address", and tries to find the beginning of the message by matching the various patterns that occur after the ".com" that I have seen in my data. It then attempts to clean up non-printable characters that occur in the message itself as well and then prints the chunks of data out one by one. This method is not 100% foolproof, however if should be more than sufficient in order to allow you to at least get an understanding of the message conversations that have occurred on the device. 


The contents of a modified "Message History" file that match our regular expression that we search for, since the data structure is currently unknown.


The parsed contents of the above file. Different programs recognize different encoding schemes, in this case Notepad translates \x84\x00 as ",,".


"Chat Conversations"

Initially I thought that this file would contain the same data as found in Message History, but interestingly enough, it did not. This seems to contain a list of what appears to be (guessing here, based on the limited amount of data I have to work with) the most recent chat message that was received from an individual that is listed in the Message History file(s). What this means is that if there is a Message History file associated with the username "peter_quill_88@hotmail.com", there will be an entry in the chat conversation folder with that user name and the message as well. So in order to try to be as complete as possible, the script can also handle this file. Fortunately, the data in this file seems to follow a very rough structure, and the data format of this file appears to be:


  • Hex characters \xE8\xFF\xFF\xFF
  • Variety of characters
  • Number 1
  • Colon
  • Email Address
  • Message
  • Variety of characters
  • Hex characters \x00\x00\x00\xBC


Using this, our regular expression to extract the data is going to be

"\xE8\xFF\xFF\xFF([\w\W]+?)\x00\x00\x00\xBC"

As stated above, the script matches that pattern, it then attempts to format the data structure by replacing the "1:" with the term "Email Address", and tries to find the beginning of the message by matching the various patterns that occur after the ".com" that I have seen in my data. It then attempts to clean up non-printable characters that occur in the message itself as well and then prints the chunks of data out one by one. I think it bears repeating again that this method is not 100% foolproof, however if should be more than sufficient in order to allow you to at least get an understanding of the message conversation that is stored in this file. 


"Status"

The file containing the term "Status" seems to be the most well-structured file within the data. The data itself seems to be stored in a similar structure as the Chat Conversations file, although there are differences in the data itself.


  • Hex characters \xE8\xFF\xFF\xFF
  • Variety of characters
  • Number 1
  • Colon
  • Email Address
  • Username (if present)
  • Microsoft Object (if present)
  • Variety of characters
  • Hex characters \x00\x00\x00\x01

Just like the above examples, the regular expression that we use to extract data is:

"\xE8\xFF\xFF\xFF([\w\W]+?)\x00\x00\x00\x01"


As with the above examples, the script then takes this data and attempts to clean it up in a user readable fashion. The script replaces the "1:" with the term "Email Address", it attempts to identify is a Username is present and if it is, label it accordingly. It also attempts to digest the embedded Microsoft Object, if present, and format that data into a more easily readable format.


The Script

The script, which is written in Perl (insert obligatory coding language debate comment here), runs by either specifying a "file" or a "folder", which should be used after identifying the Windows Live Messenger application on your iOS device or iOS backup file(s). The application attempts to digest the file based on the fully restored filename (i.e. having "Status", "MessageHistory", or "ChatConversations" in that file). In other words, pointing the script at a raw iOS backup folder will not yield any results since it is looking for specific patterns in the file name, rather than opening every single file and trying to find the data structure(s) the script is looking for.

The output is just regular text, so you can copy/paste from the command prompt or you can save it to a file of your choosing. Be advised that the formatting is not 100% perfect, so it might require some cleanup before presenting the "final" version of the output but it should allow you to get a much better idea of any messages that are stored in the application data since no other mobile forensic tool on the market currently seems able to handle this data.

If you have any questions or issues please do not hesitate to let me know. You can download the script here.


Filename: "wlm_ios_parser.pl"
MD5: c6f3f7d09bea79d69dc3cd60da1fc17a
SHA256: 99380423520b16385dde1493bb46ad439459a221346b65e62451b9a2d7c17bac


Viewing all 59 articles
Browse latest View live